Big life update: I bought a camera. I’ve wanted to buy a nice DSLR for literally 5 years or so, but only now with some side consulting could I justify shelling out the cash. Turns out, my great grandfather was a professional photographer. So, camera time…
I knew I would be using this camera for product photography on a near-daily basis, so I decided to go for a nice camera right off the block rather than putzing around with an APS-C with the plan to upgrade. All of my friends have Nikon’s so I chose to stick with them so I can steal my friend’s lenses. Many friends recommended the D850, but I stumbled upon the mirrorless Nikon Z series and instantly decided that was the way to go mostly due to the smaller size. The new Z series is even backwards compatible with the F-mount lenses with the help of an adapter (included in the kit I bought). The Z series cameras also have some strange features like “Supports charging over USB while the camera is on” (how did it take until 2021 to implement this???) and even taking pictures over bluetooth through Nikon’s app. I eventually settled on the Nikon Z6II, and with some mild credit card pain, I pressed the buy button. Never having owned a camera at all before, I wasn’t quite sure what to expect.
At the beginning, I was pretty turbo-bad at operating the beast, as the learning curve on ‘how to operate camera’ is steep. But as time went on, I started actually being able to produce some photos which weren’t complete garbage. So far, I have been consistently impressed- this thing rocks. I am by no means an expert in photography by any stretch of the imagination, but it’s pretty clear that this thing blows away any phone completely. I watched a ton of Youtube tutorials on how to do photography, and have slowly gotten better. Here are a few of my favorite photos.


A nice camera can make anything look beautiful. Like, for example, this mind bogglingly beautiful and aesthetic photo of nothing less than a heap of dung:

Or how about this well framed photo of a garbage can?

I eventually ended up with no less than five different lenses (four pictured below because I had to use one to take the photo):

Surprisingly I do not regret buying any of these lenses. The four pictured are all the NIKKOR Z-mount lenses, which everyone seems to love. In no particular order:
The classic 24-70mm F/4. This lens is perfect to take out into nature, where the best thing to have is a single versatile lens which isn’t massive. Changing lenses in the woods seems annoying. I bought this before Nikon released the 24-120, which is larger and heaver than the 24-70, but has an impressive 5:1 zoom. If I were to buy it again, I might have gone for the 24-120, but the 24-70 is lighter and more compact which is probably better for hiking so I don’t know which is truly better.
A weird one: Nikon recently released the 40mm F/2 compact lens. This is a perfect “social gathering lens” as it is wide enough to capture the whole scene in a relatively confined space, but not quite wide enough too be a wide-angle (which I am not a huge fan of). A more strange benefit of this lens is that, in general, people have an irrational fear of staring down the barrel of a large lens. Therefore, having a smaller lens generally is good for parties to avoid scaring people. It was also about half the price of the others which is nice, although the build quality is noticeably less good than the 50 and the 85 as a lot of the metal parts were replaced with plastic. Definitely still a great lens though. This lens is also wonderfully compact, and the full setup ends up feeling more like a point-an-shoot than a high end camera. This is kind of what I want for this lens anyways.
The 85mm F/1.8– also a weird lens. I got this after I got the 50mm, as I wanted something a bit tighter for project photography. It took me a while to get used to this lens, as it really does require setting up the tripod and moving some furniture to shove the tripod all the way on the other side of the room to take a photo of anything bigger than a banana. However, this lens has completely proved its worth for project photography. The photos out of a good lens with a longer focal length are just absolutely stupendous IMO. The 85 produces a photo with a much flatter view than the 50, and and also it is a lot easier to control the background without completely reshuffling my entire apartment. Changes are if I’m taking a nice photo I’m reshuffling the apartment anyways, but it is worth the results.
The classic 50mm F/1.8. This lens is pretty cool and an absolutely superb all-rounder. However, unfortunately I end up reaching for this lens relatively rarely, because I have other options which are usually better suited for the specific task I’m up to. I usually end up reaching for the 40mm when I’m taking the camera to a social event (because the 40 is a lot smaller), and end up reaching for the 85 for project photography. Still, definitely a good lens and it does find use on occasion.
Finally, the lens that I got first, which isn’t pictured in the first photo as I used it to take the picture: a Sigma 105mm F/2.8 Macro lens. This lens is the only macro I have, but probably the only one I will ever need. This is an F-mount lens, so it needs the trusty little FTZ adapter. I got the adapter in the kit I bought, so it was no problem. The adapter does make the lens stack a lot longer, but this is no problem for macro stuff where I usually use a tripod anyways. However, annoyingly, the FTZ adapter does not support the type of autofocus in this lens, so manual-only for this one. Not the worst, as again I usually tripod it anyways, and macro photography is probably 90% manual focus anyways. This is the perfect lens for taking pictures of all the PCB-related projects I do.
The bottom line: If I’m taking pictures of people in an indoor setting, I bring the 40 or 50, and if outside, the 85 is the way to go. However, if I had to buy just one lens, it is hard to go wrong with the 24-70 for its versatility.
In terms of other lenses I considered, I also considered the 24-70 F/2.8, but ultimately decided it wasn’t worth the price hike. After watching a bunch of Youtube tutorials, I found that the depth of field and bokeh difference between the F/4 and the F/2.8 is not actually that noticeable. However, the difference between the F/2.8 and the F/1.8 is extremely noticable. Another note on bokeh- I have an extremely cluttered apartment, so if I use a lens with more bokeh, I have to clean up less of the apartment to take the same quality photo…. oho…
Next up- time to do some photgraphy.
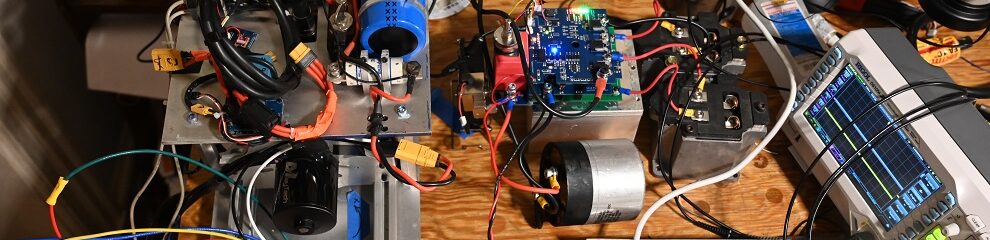
The thing object photograph was the small dyno, which proved to be WAY more challenging than I thought. Firstly, it is made of aluminum, which was polished to be highly reflective. This proved to be extremely annoying, as I don’t have any light spreaders. Secondly, it is a effectively a stack of two layers, and capturing both layers in one image proved difficult.
First up, I just took some straight-up BAD photos. Here, I had a TV in the background with some graphs, but this just ended up making the dyno very backlit.


The apartment also developed into a thorough dumpster fire.

Slowly, I began to realize that my pain was really twofold:
- the dyno was blending into the background, as all the aluminum parts on the dyno were reflecting the ambient light just as well as the background was. A lot of tutorials immediately jump to “you need a white background” which just proved to not work, at all, for the aluminum parts on the dyno as they just completely blend in.
- The electronics plate was casting a huge shadow, making the torque sensor look kind of dull. Additionally, the black anodized motors are literally black holes in the photograph.
I also ended up with a lot of salmon-colored dyno photographs as I attempted to use some horrible worklight to illuminate it as hard as possible. More light is NOT better sometimes.

Very visible in this photograph that all aluminum parts on the dyno are INDENTICAL in color to the background, therefore the dyno felt as if it was just blending in.
The solution here was twofold. I found some excellent videos on youtube which detailed how to photograph metal objects, including an extremely helpful one which detailed how to take a picture of a very shiny cheese grater. The takeaway here was that shiny metal objects do not have a color- they simply reflect light, and therefore copy the colors around them. The key here was to very selectively angle the lights to only light up the dyno itself, and avoid casting as little light onto the backdrop. I ended up moving the lights to a more top-down position, and I also installed some little blinders to minimize light cast on the background wall. This had the desired effect of turning the background into a grey rather then the pure white it was before, while the aluminum parts where kept lit. Simply adding more light was NOT the answer- originally, I had a bunch of lights pointed straight at the dyno in an attempt to light up the torque sensor, which had the unintended consequence of brightly lighting the background as well, which was why everything was blending together.

The second problem was that the electronics deck was casting a shadow, basically completely blacking out the torque sensor and motors. This had the effect of making the center of the dyno kind of a black hole, even though the torque sensor and test motors were really what I was trying to highlight all along. The solution here was to stick the light inside the dyno, right under the torque sensor. I stuck a bit of LED strip right inside the dyno. I didn’t have any warm white favorite, so ended up just throwing in some cool white. This had the effect of making it look even more sciencey, so I kept it. Cool!
With all that done (and the apartment a COMPLETE garbagepile) I finally got a really wonderful photo.

After this I did some touch-up in a combination of Nikon Studio and GIMP to make the photo more balanced, and to remove the spot on the wall. I decided this photo was “good enuf.”

There are a few things I would change about this photo- a close eye will notice that the left side of the photo is rather blown out, as the lighting on that side was too direct. I don’t have any light spreaders, so that’s just what I got. Good enuf.
Anyways, all that said- camera, fantastic object. I use this object almost every day, and have now averaged 20 photos per day. Would buy again 10/10.