Back in high school I made a wood fired evaporator out of sheet metal. I called it “The Ecraperator” for obvious reasons. Over a random weekend I had some time to go back home and fire it up again. Here it is, ready to be lit, with my dad for scale.
Its lit!! The maple syrup goes in a tray that was left over from my grandpa’s maple syrup days. The ecraporator itself is just a box with a piece of dryer vent attached to the back. The long chimney helps provide a strong draft.
So in my high school days, we would light the fire and just wait. But since I have now gone to college, it was time to USE THE POWER OF TECHNOLOGY. I rigged up a little CPU fan with a power supply, and an air duct made of cement blocks to guide the air into the stove without melting the fan.
With the fan running, the fire burned HOT. It turns out that in a wood burning reaction, the limiting factor is the air. So if you force feed the air, the fire burns FAST. I had to add more wood very frequently.
As the sun set I was able to grab some very aesthetic photos.
Now that I’m in grad school, I decided to do some math while I waited. We estimated that we had about 7 gallons to boil. The ratio of sap to maple syrup is 40:1, so for our analysis we can say that all of this must be boiled.
It takes about 9MJ to get this water from 20C up to 100C, but the vast majority of the energy required is the 60MJ required to boil the water. So, 69MJ in total for this 7 gal batch.
On the standard 1500W home burner, this would take a whopping 21 hours! Plus, it would fill your home with sticky steam, which is gross. On the ecraperator, it took only about 2.5 hours to get the batch down to 1 gallon. We did the final hour of boiling on the stove. Therefore, I estimate the ecraperator was doing about 10.8 Kw, about 7 times the heat output of a household burner. This could likely be improved by tending the fire better, and near the end we let it burn slow to avoid overboiling the batch.
Here are some nice pics of the final product.
MMmmm!!!
The next weekend, it warmed up, and the sap stopped flowing, so that’s all for the ecraperator this year. Stay tuned for next year though!
About 4 years ago Mike gave me a Ryobi 25CC weed wacker. I have always wanted to make it into a generator to to make a range extender electric vehicles.
I hid the weed whacker in various places around MITERS hoping one day I’d have the time to make my dream a reality. In the fall 2019, the time finally came. The weed whacker was mated to my original Prius A/C motor. This motor is very overkill and can easily out-torque and out-RPM the weed whacker, but its what I had.
The motor was mated to the weed whacker through a torque transmitter made of four “wubs.” I had heard rumors that someone made a chainsaw generator once and the end result was that the magnets just got shaken off the motor because of the extreme torque pulsations from the gas motor. The wubs should smooth the pulsations and keep the magnets safe. Additionally, the torque transmitter replaced the clutch and starter mechanism. Neither is really necessary anymore as the motor doesn’t need to idle and the electric motor can be used to start the gas motor.
I plugged in a random Jaredtroller and made up a little CAN adapter to control everything from a “safe distance” of three feet away. I programmed the motor controller to run velocity mode, and rigged a potentiometer to the CAN adapter. Here is a pic of the first test spin. The electronics just worked! (FOR NOW). This was pretty nice, as I’ve been working for a while to have a “universal motor firmware” which will run an IPM for any appliction, be it Ebike, lathe, or gas generator.
The whole assembly was brought outside for testing to prevent MITERS from filling up with gas fumes, C clamped to some stools. We connected the electronics to my electric bike’s battery, which provides power to start the generator and then a sink for generated power to go. We rigged up my laptop as a data logger as well. Here is a video which summarizes the test.
RIP electronics. Its pretty strange because there are actually two discrete explosions, separated by about 200 ms.
First explosion:
Mike recoils for 200 ms:
Second explosion:
Here’s a pics of the aftermath. The three emitter pins have been completely vaporized, as well as the shunts. Welp. There was a fuse on the bike which was supposed to prevent this… RIP. Fuse was intact, it literally did nothing. The explosions killed literally every electronic component, not just the power stage. We also lost all the logic on the motor controller, the CAN adapter, and even my programmer. Luckily my laptop was OK.
The hypothesis on what caused the explosion was that we were testing the spark plug and somehow some noise showed up on the logic power. This caused huge noise to wreck everything. Maybe some spark jumped somewhere and put 200V onto the logic or something like that- we will never know.
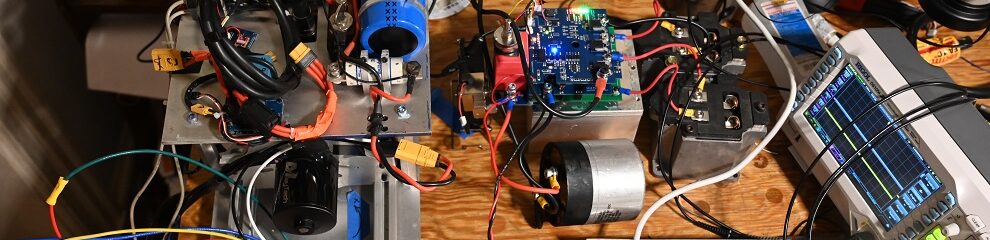
Onwards. The generator sat around the FSAE garage for a few months, waiting for some spare time to get fixed. Eventually I got around to building a new motor controller, and I wired it in. I also attached a servo to the throttle linkage, but I left it unwired and just held it to full open.
Next up- testing round 2!!
I don’t have pictures of this test, but it didn’t go very well. The motor fired once and there was a pop and a clunk. What had happened is that the flywheel had come off the crankshaft. I’m surprised this didn’t happen earlier as I was transmitting torque though the flywheel. The flywheel turned out to be connected to the shaft through an ALUMINUM key, which sheared pretty instantaneously.
I drilled a hole where the keyway used to be and put in a good old M4.
I also used retaining compound on the shaft when I reassembled the thing. This proved to hold it well enough.
The old plastic torque transmitter attached to the tabs on the flywheel which originally were used for the pull starter. I made a new aluminum torque transmitter which clamped directly to the shaft instead of attaching to the flywheel.
Next test round!!! Mike and I went for testing round 3.
We got it working, but badly. The motor would not run on its own. However, it would run for several seconds when the buld was pressed. We suspected problems with the carb. So I took the whole carb apart:
It turned out that the little fuel screen was ENTIRELY clogged with crap!!!
I cleaned it out with some air.
Testing round 4!!
This time, it worked! The exhaust gas was hot, and with I measured current flowing back into the battery. The carberator did need some amount of airflow restriction to suck in enough fuel. at high RPMs and with a lot of airflow restriction, I measured 4.0 amps going back into the battery- that’s 600 watts!
Not bad. I need to figure out some way to either make an airflow restrictor or pressurize the fuel tank to get more fuel. Stay tuned!!